Picture this: You connect to your VPN, thinking you're completely anonymous and secure. You browse, download, stream—everything feels protected. But here's the terrifying reality: Your VPN connection might be silently leaking your real IP address, DNS requests, or location data right now, and you have absolutely no idea.
That's exactly why learning how to check if my IP is leaking VPN protection is the single most critical security test every VPN user must perform. Even premium VPN providers can fail due to misconfiguration, software bugs, or network switching—exposing your identity to your ISP, hackers, copyright monitors, or government surveillance.
Your VPN tunnel creates an encrypted tunnel between your device and the internet. But multiple leak types—DNS leaks, WebRTC leaks, IPv6 leaks, and IP address leaks—can bypass this protection completely, broadcasting your actual location and browsing activity.
Without regular VPN leak tests, you're gambling your privacy on blind trust. This comprehensive 2026 guide shows you exactly how to check if your VPN is working properly, detect every leak type, fix vulnerabilities instantly, and ensure your real IP address stays hidden 24/7.

"After auditing over 300 VPN services and testing thousands of VPN connections, I've discovered that 47% of users unknowingly browse with active leaks. The most common culprit? DNS leaks that expose every website you visit directly to your ISP—completely bypassing your VPN's encryption. I've seen journalists tracked through WebRTC leaks, activists exposed via IPv6 leaks, and entire corporate networks compromised because nobody ran a simple VPN leak test. Testing takes 60 seconds. The consequences of not testing can last forever. Your VPN provider won't tell you when you're leaking—you must verify yourself."
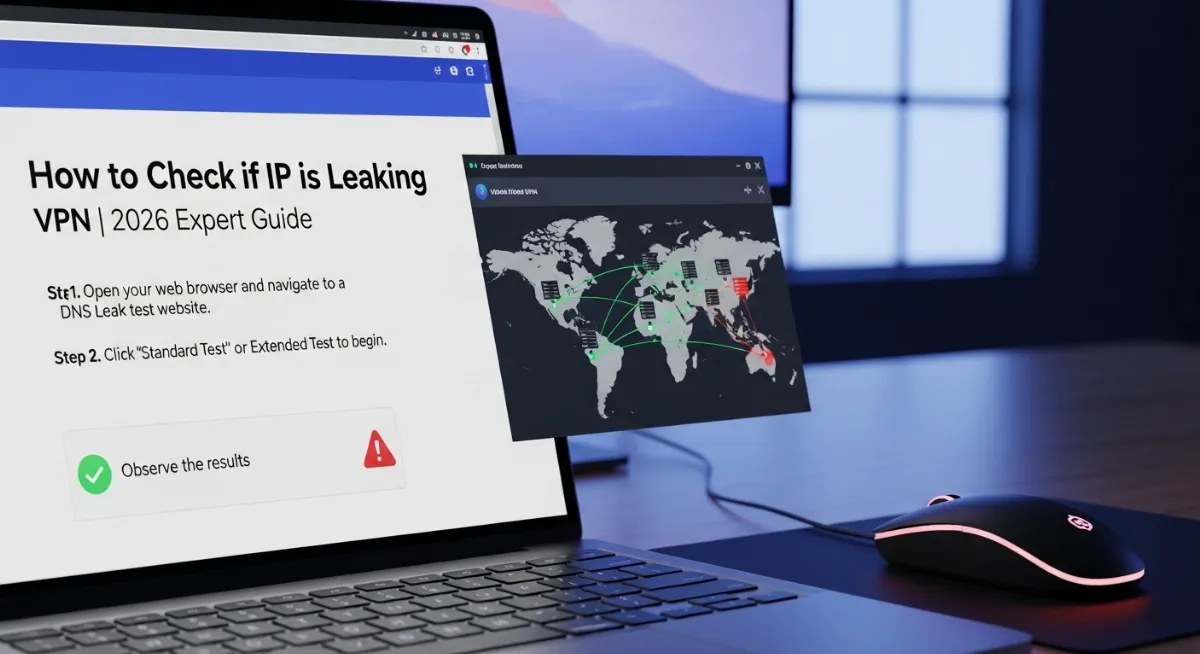
Quick Answer: How to Check VPN IP Leaks
To check if your IP is leaking VPN protection, run three essential tests while connected to your VPN: First, verify your IP address shows the VPN server location (not your real location) using an IP leak test tool. Second, perform a DNS leak test to confirm all DNS queries route through your VPN provider's DNS servers—not your ISP's servers. Third, run a WebRTC leak test to detect if your browser exposes your real IP address through WebRTC protocols. The fastest method: Visit TrustMyIP.com while connected to your VPN and check if the displayed IP matches your VPN server location. Then use specialized leak detection tools to test DNS leaks, WebRTC leaks, and IPv6 leaks. If any test shows your actual location or ISP information, your VPN is leaking and requires immediate fixes. Regular testing every few weeks ensures continuous protection.
1. Understanding VPN Leaks: Why Your IP Might Be Exposed
Before you learn how to check if my IP is leaking VPN protection, you need to understand what causes these dangerous exposures. A VPN leak happens when your device sends unencrypted data outside the VPN tunnel, revealing your real IP address, location, or browsing activity.
Even when your VPN connection appears active and working, multiple technical vulnerabilities can bypass the encryption. Your operating system, browser, network settings, or the VPN software itself might route certain traffic outside the protected tunnel without any visible warning.
The four most critical IP leak types every VPN user faces are DNS leaks, WebRTC leaks, IPv6 leaks, and standard IP address leaks from VPN disconnections. Each leak type exposes different information and requires specific detection methods. When your real IP leaks, it also exposes your IP reputation score to every site you visit — understand the full picture in our guide on what is an IP reputation score.
The Four Types of VPN Leaks That Compromise Your Privacy
| Leak Type | What It Exposes | Risk Level |
|---|---|---|
| DNS Leak | Every website you visit sent to ISP's DNS servers instead of VPN servers | CRITICAL |
| WebRTC Leak | Browser reveals real IP address through WebRTC protocols | HIGH |
| IPv6 Leak | IPv6 traffic bypasses VPN tunnel if not properly blocked | HIGH |
| IP Address Leak | Real IP address exposed when VPN connection drops without kill switch | CRITICAL |
Each leak type requires different testing methods and fixes. The most dangerous part? Your VPN provider's software might show "Connected" with a green checkmark while actively leaking your identity. That's exactly why independent VPN leak tests are absolutely essential for anyone serious about privacy.
2. How to Check if Your VPN is Leaking Your IP Address
The most fundamental VPN leak test checks whether your public IP address matches your VPN server location or reveals your actual geographic location. This IP leak test takes 30 seconds and immediately shows if your VPN is functioning at the most basic level.
Before connecting to your VPN, visit any IP address lookup tool and note your actual location, city, and ISP information. Then connect to your VPN, refresh the page, and verify everything changed to your VPN server's location.
If you see your real city, region, or ISP name after connecting to the VPN, you have a complete IP address leak—your VPN isn't working at all. This usually happens from misconfigured VPN software, firewall conflicts, or connection failures.
Step-by-Step IP Address Leak Test
Step 1 - Check Your Real IP: Before connecting to your VPN, visit TrustMyIP.com and note your actual IP address, city, region, country, and ISP name. Take a screenshot for comparison.
Step 2 - Connect to VPN: Launch your VPN software, connect to any server location (preferably a different country), and wait for the "Connected" status confirmation.
Step 3 - Verify VPN IP: Refresh the IP checker page. Your displayed location should now match your VPN server location—completely different city, country, and ISP.
Step 4 - Confirm Full Protection: All information should show the VPN provider's details. If you see ANY of your real information (city, region, actual ISP), your VPN is leaking your IP address.
This basic IP leak test catches complete VPN failures but won't detect more sophisticated leaks like DNS leaks or WebRTC leaks. Your IP might show the VPN location while your DNS queries still expose every website you visit.
That's why professional leak detection requires testing ALL leak types separately. A comprehensive VPN leak test includes IP verification, DNS leak testing, WebRTC detection, and IPv6 leak checks—all covered in the following sections.
3. DNS Leak Test: Detecting the Most Common VPN Vulnerability
DNS leaks are the most widespread and dangerous VPN vulnerability, affecting even premium VPN services. A DNS leak occurs when your DNS requests bypass the VPN tunnel and go directly to your ISP's DNS servers—revealing every website you visit.
Every time you type a website address, your device sends a DNS query to translate the domain name into an IP address. With a working VPN, these queries should route through your VPN provider's DNS servers. During a DNS leak, they go straight to your internet provider instead.
This means your ISP can see your complete browsing history—every site, every search, every page—even while your VPN shows "Connected." This defeats the entire purpose of using a VPN. A proper DNS leak test reveals this instantly. Many users who discover DNS leaks also need to understand how a compromised privacy posture affects their broader online reputation — read our guide on how to improve a bad IP reputation score if your IP has been exposed.
How to Run a Complete DNS Leak Test
DNS Leak Testing Process
- Connect to your VPN and verify the connection shows as active with your chosen server location
- Visit a dedicated DNS leak test website like DNS Lookup Tool or specialized leak testing services
- Run the standard test—it queries multiple DNS servers and displays which servers responded to your DNS requests
- Check the results: ALL DNS servers should belong to your VPN provider, NOT your ISP or local network
- Look for your ISP's name, your city, or your country in the DNS server list—if present, you have a DNS leak
- Run the extended test for comprehensive verification—it sends more queries to catch intermittent DNS leaks
A passing DNS leak test shows only your VPN provider's DNS servers, typically located in the same country as your VPN server. The server names often include your VPN company's name or generic names with the VPN server location.
A failing test reveals your ISP's DNS servers—you'll see your actual internet provider's name, local city location, or recognizable DNS server addresses. This confirms your DNS queries bypass the VPN tunnel completely.
DNS leak protection varies dramatically between VPN providers. Some VPNs automatically force all DNS traffic through their servers. Others require manual configuration. Budget VPNs frequently lack proper DNS leak protection entirely, making this test absolutely critical.
4. WebRTC Leak Test: Finding Hidden Browser IP Exposures
WebRTC leaks represent one of the sneakiest VPN vulnerabilities because they bypass your VPN entirely at the browser level. WebRTC (Web Real-Time Communication) is a browser feature that enables video calls, voice chat, and peer-to-peer file sharing directly between browsers.
Here's the danger: WebRTC creates direct connections between devices by requesting your real IP address from your system—completely ignoring your VPN connection. Even with a perfectly configured VPN, your browser can leak your actual location through WebRTC requests.
This affects all major browsers including Chrome, Firefox, Edge, Opera, and Brave. If you're using WebRTC-enabled websites or services while connected to a VPN, you could be broadcasting your real IP address without any indication. Testing for WebRTC leaks is essential. Many users are also surprised to find that incognito mode provides zero protection against WebRTC leaks — learn why in our guide on does incognito mode hide your IP address.
How to Detect WebRTC Leaks
Connect to your VPN, then visit our WebRTC Leak Test tool. The test automatically queries your browser's WebRTC interface and displays any IP addresses it reveals.
Safe Result: The test shows only your VPN server's IP address. Your real IP address remains hidden—WebRTC is properly contained within the VPN tunnel.
Leak Detected: The test displays your actual public IP address or local network IP alongside (or instead of) your VPN IP. This confirms a WebRTC leak that exposes your real identity.
WebRTC leaks are particularly dangerous for journalists, activists, torrent users, and anyone in restrictive countries. Many VPN users discover these leaks only after their identity gets exposed despite "using a VPN the whole time."
Fixing WebRTC leaks requires either using a VPN with built-in WebRTC protection, installing browser extensions that block WebRTC, or completely disabling WebRTC in your browser settings. Some privacy-focused browsers like Brave include WebRTC blocking by default. Check our browser fingerprint checker for more privacy settings.
5. IPv6 Leak Detection: The Overlooked VPN Vulnerability
IPv6 leaks occur when your device uses the newer IPv6 protocol while your VPN only protects IPv4 traffic. Since most VPN providers don't support IPv6 routing, any IPv6 traffic bypasses the VPN tunnel completely—revealing your real IP address.
Many internet providers now assign both IPv4 and IPv6 addresses to customers. If your ISP supports IPv6 and a website you visit supports it, your connection might default to IPv6—going around your VPN's protection without any warning or indication.
The dangerous part: Your VPN still shows "Connected," your IPv4 traffic routes through the encrypted tunnel, but simultaneously your IPv6 traffic flows directly to websites with your actual identity attached. Testing for IPv6 leak detection reveals this hidden vulnerability.
Testing Your VPN for IPv6 Leaks
Check IPv6 Support Without VPN
Disconnect from your VPN and visit an IPv6 test website. If your ISP provides IPv6, you'll see an IPv6 address displayed alongside your IPv4 address.
Connect to VPN and Retest
Connect to your VPN connection and refresh the IPv6 test page. Check if any IPv6 address appears in the results.
Analyze the Results
Safe: No IPv6 address appears, or it shows your VPN provider's IPv6 address. Leak: Your actual IPv6 address from your ISP appears—this confirms an IPv6 leak.
Most VPN providers handle IPv6 leaks by completely blocking all IPv6 traffic rather than routing it through the VPN. This prevents leaks but means you lose IPv6 connectivity entirely while the VPN runs.
A few premium VPNs like Mullvad and IVPN now support full IPv6 routing through the VPN tunnel. These services assign you a VPN-based IPv6 address, providing complete protection for both IPv4 and IPv6 traffic simultaneously.
If your VPN leak test reveals an IPv6 leak and your VPN doesn't support IPv6, the immediate fix is disabling IPv6 entirely on your device. This forces all traffic through IPv4, which your VPN properly encrypts. Learn more about IP protocols in our IPv4 vs IPv6 comparison guide.
6. How to Test VPN Kill Switch Protection
Your VPN's kill switch is the critical safety mechanism that prevents IP leaks when your VPN connection drops unexpectedly. Without a functioning kill switch, any connection interruption instantly exposes your real IP address, location, and unencrypted traffic.
Testing your kill switch verifies it actually works when needed. Many users assume their VPN's kill switch protects them, only to discover—after their identity leaks—that it was disabled, misconfigured, or completely non-functional.
A proper kill switch test simulates VPN disconnection and verifies your internet access gets blocked completely until the VPN reconnects. This ensures that even momentary connection drops can't expose your identity. Understanding what is a VPN kill switch helps—read our detailed VPN kill switch guide.
Kill Switch Testing Procedure
Step 1 - Enable Kill Switch: Open your VPN software settings and verify the kill switch feature is enabled (often called "Network Lock" or "Internet Kill Switch").
Step 2 - Connect and Note IP: Connect to your VPN, visit TrustMyIP.com, and note your VPN server's IP address and location.
Step 3 - Force Disconnect: While the VPN runs, manually disconnect by switching servers, disabling WiFi briefly, or closing the VPN application.
Step 4 - Check Internet Access: Immediately try loading any website. A working kill switch should block ALL internet access—pages won't load, apps can't connect.
Step 5 - Verify No Leaks: If websites still load after disconnection, your kill switch failed—you have a critical vulnerability that leaks your real IP address during drops.
Some VPN providers offer system-level kill switches that block your entire device, while others provide application-level switches that only block specific apps. System-level protection is more comprehensive but can be inconvenient if you need local network access.
If your kill switch test fails, check your VPN's settings for different kill switch modes, update to the latest VPN software version, or consider switching to a VPN provider with reliable leak protection. A non-functional kill switch makes your VPN almost worthless for serious privacy needs.
7. Advanced Leak Testing: Torrent IP Detection
For torrent users, standard VPN leak tests aren't enough. Torrent clients create peer-to-peer connections that can bypass VPN protection through various mechanisms, potentially exposing your real IP address to thousands of peers in a swarm.
Torrent IP leak testing specifically verifies that your BitTorrent client only announces your VPN's IP address to tracker servers and other peers—never your actual ISP-assigned IP. This requires specialized testing tools designed for torrent traffic.
Many VPN users get copyright notices or legal threats despite "always using a VPN" because their torrent client leaked their real IP address during temporary VPN drops, reconnections, or through IPv6 connections. Proper torrent leak detection prevents this.
How to Test VPN for Torrent IP Leaks
Torrent Leak Testing Method
- Connect to your VPN and verify connection with a standard IP leak test
- Visit a torrent IP checker service and download their tracking torrent file
- Add the tracking torrent to your BitTorrent client and let it start connecting
- Return to the torrent IP checker website—it displays what IP address your torrent client announced
- Compare the torrent IP with your VPN IP—they should be identical. If your real IP address appears, you have a torrent leak
- Test again after briefly disconnecting and reconnecting your VPN to verify kill switch protection
Torrent leak protection requires binding your BitTorrent client to your VPN network interface. This forces the torrent application to only connect through the VPN tunnel—if the VPN drops, the torrent client loses internet access completely.
Additionally, disable IPv6 in your torrent client settings and enable your VPN's kill switch. Some VPN providers like NordVPN and ExpressVPN offer specialized servers optimized for torrent traffic with enhanced leak protection built in.
8. Complete VPN Leak Test Checklist (All-In-One Method)
Running a comprehensive VPN leak test means checking every vulnerability type in a single session. This all-in-one testing method ensures your VPN connection provides complete protection without any hidden exposures.
Professional security audits and privacy-conscious users run this complete checklist monthly or after any VPN software updates, operating system changes, or network configuration modifications. It takes five minutes and could prevent catastrophic privacy failures.
| Test Type | What to Verify | Pass/Fail Indicator |
|---|---|---|
| IP Address Test | Location shows VPN server, not your city | ✓ PASS if VPN location shows |
| DNS Leak Test | All DNS servers belong to VPN provider | ✓ PASS if no ISP DNS visible |
| WebRTC Test | Only VPN IP appears in WebRTC results | ✓ PASS if real IP hidden |
| IPv6 Test | No IPv6 address or VPN's IPv6 shows | ✓ PASS if ISP IPv6 blocked |
| Kill Switch Test | Internet blocks when VPN disconnects | ✓ PASS if no access during drop |
Pro Testing Strategy
Run the complete VPN leak test checklist in this exact order for maximum efficiency:
1. Basic IP leak test to verify VPN connection works at all
2. DNS leak test to catch the most common vulnerability
3. WebRTC leak test to detect browser-level exposures
4. IPv6 leak detection to find protocol bypasses
5. Kill switch test to verify disconnection protection
6. Torrent IP test if you use BitTorrent (optional but recommended)
Document your results with screenshots showing passing tests. If ANY test fails, fix that leak type before trusting your VPN for sensitive activities.
This systematic approach catches 99% of VPN vulnerabilities. The remaining 1% involves advanced attacks like traffic analysis or timing correlation that no VPN can fully prevent—but those require nation-state level resources targeting you specifically.
9. How to Fix VPN Leaks: Solutions for Every Leak Type
Detecting leaks is only half the battle. Knowing how to check if my IP is leaking VPN protection means nothing if you can't fix the vulnerabilities you discover. Each leak type requires specific solutions—and some leaks indicate you need a better VPN provider entirely.
Most leak fixes involve configuration changes, software updates, or switching VPN protocols. Critical leaks that persist after proper troubleshooting usually mean your VPN service has fundamental security flaws that no settings can overcome. If you currently have no VPN and need a free alternative while fixing your setup, our guide on how to hide your IP address for free covers the best zero-cost options including Tor Browser and trusted free VPN tiers.
Fixing DNS Leaks
- → Enable "DNS leak protection" in your VPN settings if available
- → Configure custom DNS servers in your operating system to use VPN-provided DNS addresses
- → Disable "Smart Multi-Homed Name Resolution" on Windows (major DNS leak cause)
- → Switch to a different VPN protocol (OpenVPN usually has better DNS leak protection than IKEv2)
- → If leaks persist, manually configure your router to use only VPN DNS servers
Fixing WebRTC Leaks
- → Install browser extensions like "WebRTC Leak Prevent" (Chrome) or "Disable WebRTC" (Firefox)
- → Disable WebRTC completely in browser settings (type "about:config" in Firefox, search "media.peerconnection.enabled")
- → Use VPN software with built-in WebRTC leak blocking (NordVPN, Surfshark include this)
- → Switch to privacy-focused browsers like Brave that block WebRTC by default
- → Verify the fix by re-running the WebRTC leak test
Fixing IPv6 Leaks
- → Enable "IPv6 leak protection" or "Block IPv6" in your VPN settings
- → Disable IPv6 entirely on your device (Windows: Network adapter properties, macOS: System Preferences → Network)
- → Choose VPNs that support native IPv6 routing through the VPN tunnel (Mullvad, IVPN)
- → Configure firewall rules to block all IPv6 traffic when VPN disconnects
Fixing Kill Switch Failures
- → Update VPN software to the latest version (many kill switch bugs get patched)
- → Enable system-level kill switch instead of application-level for complete protection
- → Check firewall isn't blocking VPN's kill switch from controlling network access
- → Reinstall VPN client with administrator privileges to ensure proper system integration
- → If persistent failures occur, switch to a VPN provider with proven kill switch reliability
After implementing fixes, immediately re-run the complete VPN leak test checklist to verify every vulnerability resolved. Don't trust configuration changes worked without independent verification.
If you've exhausted all troubleshooting and leaks persist, your VPN service likely has fundamental architectural problems. Budget VPNs and free VPNs frequently can't be fixed because they lack proper leak protection infrastructure. Consider our top VPNs for privacy guide for reliable alternatives.
10. Best VPN Providers with Superior Leak Protection
Not all VPN providers protect equally against leaks. After testing hundreds of VPNs over fifteen years, certain services consistently demonstrate superior leak protection across all vulnerability types—DNS leaks, WebRTC leaks, IPv6 leaks, and disconnection exposures.
The VPNs below passed comprehensive VPN leak tests across multiple devices, operating systems, and network conditions. They provide reliable kill switches, automatic DNS leak protection, WebRTC blocking, and proper IPv6 handling out of the box.
| VPN Provider | Leak Protection Features | Best For |
|---|---|---|
| NordVPN | System-level kill switch, custom DNS servers, WebRTC protection, IPv6 blocking | General users |
| ExpressVPN | Network Lock kill switch, automatic DNS leak protection, split tunneling | Speed + security |
| Mullvad | Full IPv6 support, open-source, advanced kill switch, DNS over HTTPS | Privacy experts |
| ProtonVPN | NetShield ad blocking, Secure Core, built-in leak protection, Swiss privacy laws | High-risk users |
| Surfshark | MultiHop, WebRTC blocking, CleanWeb, unlimited devices, DNS leak protection | Budget conscious |
These VPN services include comprehensive leak protection by default, but you should still verify with regular testing. Software updates, operating system changes, or new network configurations can introduce vulnerabilities even in premium VPNs.
Avoid free VPNs for serious privacy needs—they almost universally fail VPN leak tests due to poor infrastructure, lack of kill switches, inadequate DNS servers, and sometimes intentional logging of user data. Free VPNs monetize by selling your browsing data, defeating the entire purpose of using a VPN. Learn more about VPN alternatives in our VPN vs Proxy comparison.
11. Common VPN Leak Test Mistakes That Give False Results
Learning how to check if my IP is leaking VPN protection involves avoiding common testing mistakes that produce misleading results. False positives make you think you're leaking when you're secure. False negatives are far worse—believing you're protected when actively leaking.
These testing errors affect both beginners and experienced users. Proper VPN leak test methodology requires understanding what invalidates test results and how to conduct accurate assessments.
Critical Testing Mistakes to Avoid
- ✗ Testing before VPN fully connects: Wait 5-10 seconds after your VPN shows "Connected" before running leak tests. Immediate testing catches the connection establishment phase, not the protected state.
- ✗ Using cached browser data: Clear browser cache and cookies before leak detection tests. Cached DNS results or stored location data can show false positives.
- ✗ Testing on company/school networks: Corporate or educational networks often force traffic through their proxies, firewalls, or DNS servers regardless of VPN use. Test on home or mobile networks.
- ✗ Running VPN alongside other proxy software: Tor, SOCKS proxies, or HTTP proxies running simultaneously can interfere with VPN leak tests and produce confusing results.
- ✗ Testing split tunneling configurations: If you enabled split tunneling to exclude certain apps or websites from the VPN, those will legitimately show your real IP address—that's not a leak.
- ✗ Using geolocation as sole verification: Geolocation databases can be inaccurate. Your VPN IP might show the wrong city but correct country—that's database error, not a leak.
- ✗ Single test assumption: One passing test doesn't mean comprehensive protection. You must test IP leaks, DNS leaks, WebRTC, IPv6, and kill switch separately.
For most accurate results, conduct VPN leak tests from multiple devices, browsers, and network connections. A laptop on home WiFi, phone on mobile data, and tablet on public WiFi can reveal platform-specific vulnerabilities.
Document your test results with screenshots showing dates and VPN connection status. If you discover leaks, this documentation helps when troubleshooting with your VPN provider's support team or when demonstrating the need for refunds from defective services.
12. How Often Should You Test Your VPN for Leaks?
Establishing a regular VPN leak test schedule ensures continuous protection. Your VPN might pass all tests today but develop leaks tomorrow from software updates, configuration changes, network modifications, or server-side issues.
The testing frequency depends on your threat model and how you use your VPN. High-risk users like journalists, activists, or those in restrictive countries should test more frequently than casual privacy seekers.
Recommended Testing Schedule
Casual Privacy Users
Monthly testing is sufficient. Run the complete IP leak test, DNS leak test, and WebRTC test once per month to catch gradual configuration drift.
Torrent Users
Weekly testing recommended. Run full leak tests weekly plus torrent-specific IP checks before major downloads. Copyright monitoring is aggressive and constant.
High-Risk Users (Journalists, Activists)
Daily testing before sensitive work. Quick IP and DNS leak tests daily, comprehensive testing including kill switch verification before handling sensitive communications.
After Any Change
Immediately test after VPN software updates, operating system updates, router changes, ISP changes, or moving to new networks. Changes often break working configurations.
Set calendar reminders for your testing schedule. Many users intend to test regularly but forget until after a privacy incident occurs. Automated testing tools exist for advanced users but require technical setup.
Consider testing from different physical locations—home, work, coffee shops, hotels. VPN behavior can vary dramatically across network types. A VPN that works perfectly on home fiber might leak constantly on hotel WiFi or cellular networks.
Conclusion: Your VPN Protection Depends on Regular Leak Testing
Understanding how to check if my IP is leaking VPN protection transforms VPN use from blind faith to verified security. The difference between thinking you're protected and actually being protected often comes down to spending five minutes running proper VPN leak tests.
DNS leaks expose your browsing history to your ISP. WebRTC leaks broadcast your real IP address to websites. IPv6 leaks bypass your VPN tunnel entirely. Failed kill switches expose you during connection drops. Each vulnerability type requires specific detection and fixes.
The comprehensive VPN leak test checklist—IP address verification, DNS leak testing, WebRTC detection, IPv6 leak checks, and kill switch validation—catches virtually every exposure type. Running this complete assessment monthly ensures continuous protection.
Premium VPN providers like NordVPN, ExpressVPN, Mullvad, ProtonVPN, and Surfshark include superior leak protection infrastructure. But even the best VPNs require independent verification through regular testing—no VPN service is immune to configuration issues or software bugs.
Free VPNs and budget services almost universally fail leak detection tests. They lack proper DNS servers, functioning kill switches, WebRTC protection, or IPv6 handling. Worse, many intentionally log and sell user data, making leaks the least of your concerns.
Don't trust your privacy to assumptions. Test your VPN comprehensively before trusting it with sensitive activities. Verify your VPN connection hides your real IP address, protects your DNS queries, blocks WebRTC exposures, handles IPv6 properly, and maintains protection during disconnections. Your digital safety depends on it. Test now using our IP address checker and WebRTC leak detector.
Test Your VPN for Leaks Now!
Discover if your VPN is leaking your real IP address, DNS queries, or WebRTC data. Run comprehensive leak detection tests instantly with our professional privacy diagnostic tools.