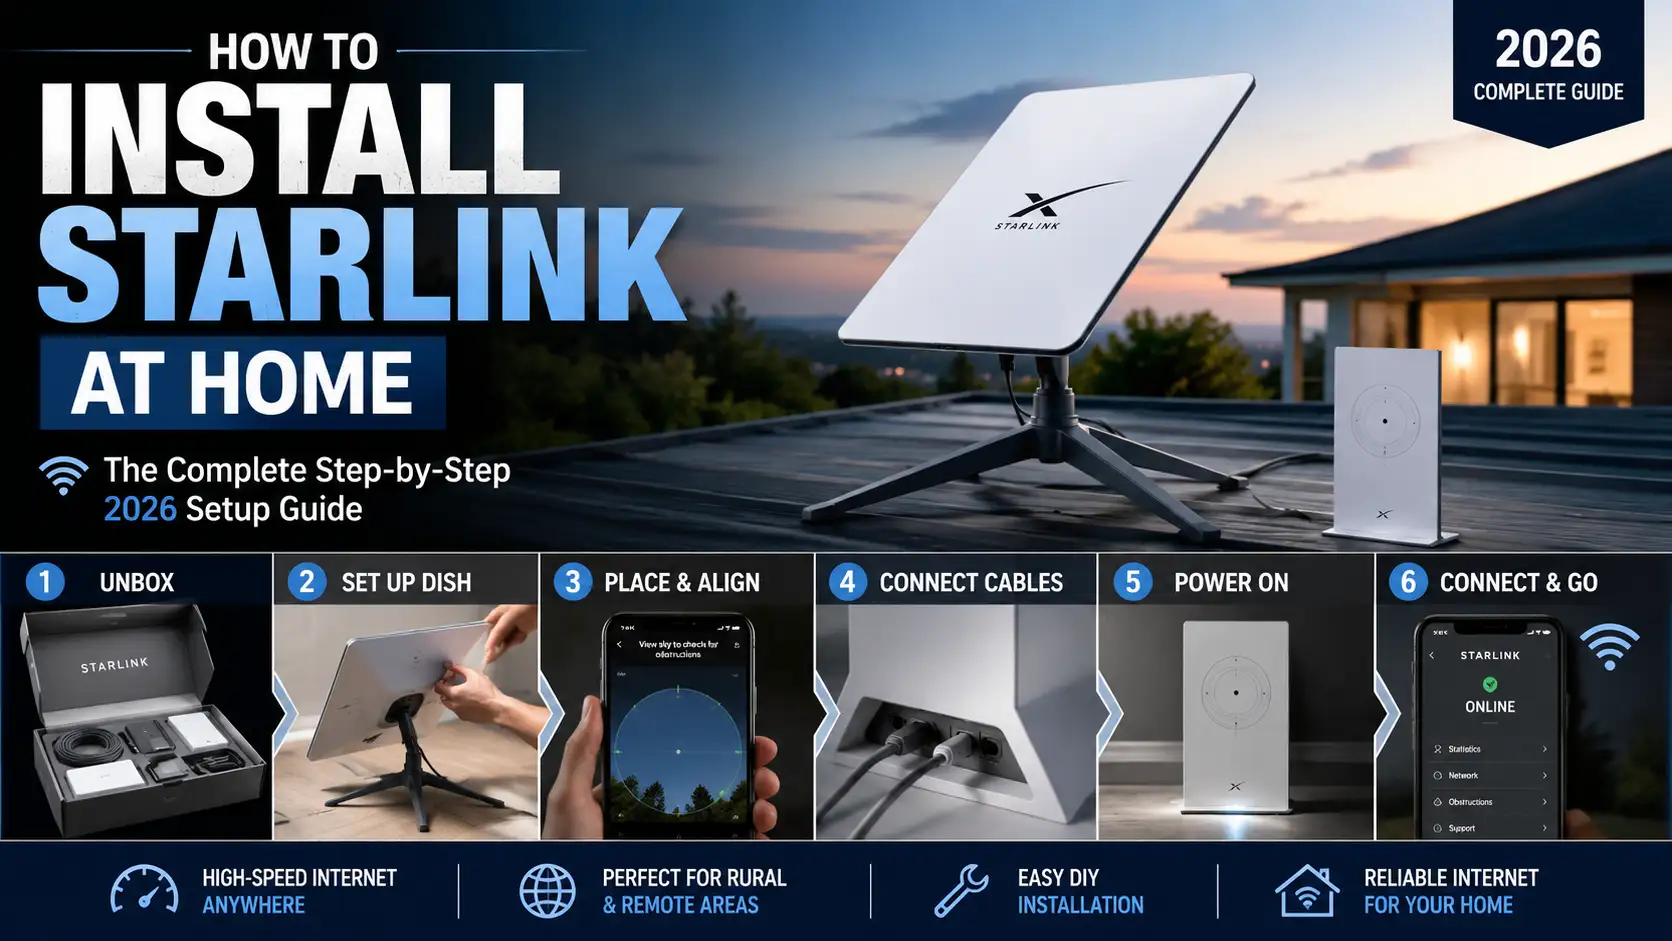
Installing Starlink at home comes down to three real jobs: finding a patch of open sky, mounting the dish where the cable can reach your router, and letting the Starlink app pair everything to your Wi-Fi. A temporary setup takes 15 to 30 minutes. A permanent, weatherproofed mount takes 2 to 4 hours. Neither path requires a technician visit, though a small share of installs genuinely call for one.
The kit that ships today is not the one reviewers tested two years ago. SpaceX released the Starlink V5 dish on July 14, 2026 — a terminal nearly half the size and weight of the outgoing Standard kit, built to cut average power draw roughly in half. If you ordered recently, there is a real chance V5 hardware is sitting in your box right now instead of the older Standard V4 most existing guides describe.
That gap matters here, because mount weight ratings, power budgets, and even the box contents changed with the new hardware. This guide covers both generations side by side, plus the parts almost every installation article skips entirely: grounding your dish against lightning, why Starlink blocks port forwarding by default, and what federal law actually says if your HOA tries to stop you.
Everything below reflects Starlink's current 2026 lineup, current US pricing, and installation practices checked against the National Electrical Code and FCC rules — not a leftover 2021 unboxing video. Grab the kit, and start with the one step almost everyone skips first: checking your sky.

I get asked about Starlink installation more than almost any other setup question on this site, usually from someone standing in their yard with the box already open. The most common mistake I see is skipping the sky survey and mounting straight to the roof, then fighting obstruction warnings for a week afterward. The hardware just changed again this month with the Starlink V5 dish, which makes the whole process lighter and faster wherever it has started rolling out.
What most guides leave out is what happens after the dish goes online. Starlink puts nearly every residential customer behind CGNAT, so your router never gets a real public IP unless you pay for a Priority plan — that single fact breaks port forwarding for anyone trying to run a camera or game server. I won't pretend every install is a 20-minute job, either. Grounding and roof penetrations are the two steps where I tell people to seriously consider paying a professional instead.
Quick Answer: How to Install Starlink at Home
Starlink installation takes 15 to 30 minutes for a basic ground setup, or 2 to 4 hours for a permanent mount with proper cable routing and grounding. Most homeowners self-install with no technician, since the kit is plug-and-play — a two-story roof mount is the main case worth hiring out. Once you're online, confirm your real numbers with TrustMyIP's speed test tool.
What's In the Starlink Kit — and Why the New V5 Changes the Math
Every current Starlink order ships a self-orienting dish, a Wi-Fi router, a proprietary power-and-data cable, an AC power supply, and a kickstand base — no tools required to get online for the first time. Which exact dish you receive depends on when you ordered: most residential customers still get the Standard (V4) kit, but SpaceX began shipping the smaller, lighter Starlink V5 to select US launch zones on July 14, 2026, with availability expanding as production ramps up.
The Standard V4 dish measures roughly 594 by 383 millimeters and pairs with a separate Gen 3 Wi-Fi router — two boxes, two power draws, and a noticeably heavier mount requirement. The V5 shrinks the footprint to about 384 by 306 millimeters, weighs 1.1 kilograms against the V4's 2.9 kilograms, and cuts average power consumption by roughly half. It ships with a new compact Router Mini, an external power brick, a 15-meter cable, and — for the first time — a pipe adapter mount included in the box instead of sold separately.
| Spec | Starlink Standard (V4) | Starlink V5 | Starlink Mini |
|---|---|---|---|
| Dish size | 594 × 383 mm | 384 × 306 mm | Laptop-sized, portable |
| Dish weight | ~2.9 kg | ~1.1 kg | ~1.1 kg |
| Router | Separate Gen 3 Router | Router Mini (included) | Built into dish |
| Power draw | 75–100 W | ~40–55 W (est.) | 40–75 W |
| Rated top speed | Up to 400 Mbps | Up to 375+ Mbps | 100+ Mbps |
| Best for | Widest current availability | Newest, most efficient standard option | RVs, travel, backup internet |
SpaceX also sells the Flat High Performance kit, standard on Business, Mobility, and Maritime plans, with a wider field of view and 110 to 150 watts of power draw. Most residential installers will never need it — it exists for boats, moving vehicles, and enterprise sites where the extra cost buys real-world reliability the Standard kit can't match.
All of this hardware talks to the same underlying network — a mesh of low-Earth-orbit satellites SpaceX has been expanding since 2019. For the full picture of how satellite internet actually routes your connection, that's the right companion read; this guide stays focused on getting the physical hardware mounted and online.
Where to Install Your Starlink Dish: The Site Survey Most Guides Skip
Your Starlink dish needs a clear view of the sky roughly 25 degrees above the horizon in every direction — trees, chimneys, and roof peaks all count as obstructions, even ones you can't see from ground level. The fastest way to check is the Starlink app's built-in obstruction tool: open it, point your phone straight up using the camera, and let it scan. Anything under 5% obstruction is excellent; above 15%, relocate before you mount anything permanently.
Test more than one spot. A location that looks clear from the driveway can score 20% obstruction once the app accounts for a roofline or a neighbor's oak tree. Walk the property, scan the roof ridge, scan an eave on each side, and scan an open corner of the yard. Sites only a few meters apart can score very differently, because a single branch blocks one specific satellite pass corridor and not another.
Renting or Living Under an HOA? You Have a Real Right to Install
Renters and homeowners in HOA communities have genuine federal protection here. The FCC's Over-the-Air Reception Devices rule generally lets you install a dish under one meter in diameter — which covers every current Starlink model — on any part of your property you have exclusive use of, regardless of what your HOA's covenant says. That doesn't mean every placement is fair game; we cover the actual limits later in this guide.
Once you have a location scoring under 5% obstruction, the actual installation is refreshingly mechanical. Here's the exact sequence, step by step.
How to Install Starlink at Home: Step-by-Step
Installing Starlink follows the same core sequence whether you have the Standard, Mini, or new V5 kit: unbox and inspect the hardware, run a temporary sky test before mounting anything permanently, choose and install a mount, route the cable, connect power, and let the Starlink app finish activation. A basic temporary setup takes 15 to 30 minutes; adding a permanent mount, cable routing, and grounding stretches that to 2 to 4 hours for most single-story homes.
Installation Sequence — Start to First Connection
1Unbox and Inspect
Lay every part out and confirm the cable is fully seated into the dish connector — it occasionally ships half-plugged. Nothing inside is user-serviceable, so a visual check now saves a warranty claim later.
2Run a Temporary Sky Test
Before mounting anything permanently, set the dish on its stock kickstand outside, run the cable through a window, and power it on. Let the app finish activation and watch the obstruction map populate for at least an hour of real data before committing to a permanent spot.
3Choose Your Mount
Match the mount to your obstruction profile and roofline — a pivot or eave mount for a standard roof, or a pole mount if trees block the roof view entirely. We compare all six realistic options in the next section.
4Install the Mount
Use stainless or zinc-coated hardware only, since the dish sits in weather for years. If you're drilling into a roof, seal every penetration with polyurethane roofing sealant and a properly flashed boot — never silicone, which fails under UV within two to three years on asphalt shingles.
5Route and Ground the Cable
Run the proprietary cable to your entry point, leaving a downward drip loop just below any exterior wall entry so water sheds off the jacket instead of following it inside. Add a grounding block at the entry point if the dish is roof- or pole-mounted — full details in the grounding section below.
6Connect Power and the Router
Plug the cable into the router (or, on V5, the Router Mini), then connect the power supply. Wait roughly five minutes for the system to boot and pull its first firmware update.
7Activate and Set Up Wi-Fi
Connect to the unsecured STARLINK Wi-Fi network from your phone, open the app, and follow the prompts to name your network and set a password. The dish shows Searching, then Connected, typically within two to ten minutes.
8Test and Finalize
Run a speed test once you're online, confirm the obstruction map still reads green, and if you mounted permanently, do a final walk-around to check that cable staples and sealant are secure.
If you'd rather watch the process before starting, this walkthrough covers the same sequence from unboxing to first connection:
Video: "[2026] How to Setup Starlink for the First Time (Beginners Guide)" — a full unboxing-to-online walkthrough matching the current kit contents.
Whichever mount you land on next, these eight steps stay the same — and the mount itself is where most of the real decision-making happens. Getting that choice wrong is the single most common reason people redo their installation within the first year.
Choosing the Right Mount for Your Home
Picking the right mount depends on your obstruction profile, your willingness to drill, and local wind exposure — not personal preference. A kickstand works only for testing; a pivot or eave mount covers most single-story homes; a pole mount clears tree lines; and non-penetrating ridgeline clamps let you skip roof drilling entirely on asphalt-shingle roofs. Every option except the stock kickstand costs between $35 and $650 in hardware, depending on height.
| Mount Type | Height Added | Typical Price | Best For |
|---|---|---|---|
| Kickstand (stock) | 0.3 m | Included | Temporary testing only |
| Pivot / eave mount | 0.5–1 m | $35–100 | Standard single-story roofline |
| Ridgeline clamp (non-penetrating) | 1.5–2 m | $80–150 | Two-story homes, no drilling |
| Pole mount (3 m) | 3 m | $150–300 | Open yard, low tree cover |
| Roof mount (penetrating) | 0.5–1 m | $35–200 | Complex rooflines, long term |
| Tall pole (6 m+, concreted) | 6–9 m | $400–650 | Above tree canopy |
One detail almost nobody accounts for: wind load on a pole scales with height squared, not height itself. A 6-meter pole needs roughly four times the base anchoring of a 3-meter pole — not double — so undersized footing is the top reason a mounted dish ends up on the ground after a storm. If you're mounting above 10 feet or on a tall pole, budget for a proper concrete footing rather than a bag of quick-set mix and a shovel.
For most single-story US homes, a $35 to $100 pivot mount on the roof edge or an eave bracket solves the sky-view problem without any of the pole-engineering questions above. Save the taller pole for genuinely tree-heavy properties. Whichever mount you land on, the cable run and grounding that follow it are where a clean installation turns into a five-year one — or a leak nobody notices until it's expensive.
Running the Cable, Grounding, and Weatherproofing
Starlink's SXPOE cable carries both power and data over a proprietary connector — it is not standard Ethernet, you cannot splice it with a generic RJ45 coupler, and it comes in 75-foot or 150-foot lengths only. Route it with a downward drip loop below any exterior wall entry, so rainwater sheds off the jacket instead of following it inside, and seal the entry point with polyurethane sealant, never silicone.
The stock cable that ships with most kits runs 75 feet, which covers a typical single-story install comfortably. Two-story homes with attic runs, or a pole mount more than 50 feet from the house, usually need the 150-foot version — buying it upfront costs less than cutting a second entry hole later. Keep bends gentle; anything tighter than a 4-inch radius can damage the internal conductors.
Grounding and Lightning Protection — the Step Almost Everyone Skips
Any roof-mounted or elevated antenna in the US falls under the National Electrical Code's Article 810, which requires a grounding block and a bonded ground path — Starlink is no exception, even though the app never mentions it. According to EC&M's breakdown of NEC Article 810, the grounding conductor must be at least 10 AWG copper, run in as straight a line as practical, and bonded to the same electrode as your main electrical service. Many installers use heavier 6 AWG wire in practice for extra margin, but 10 AWG copper is the actual code minimum — not 6 AWG, as several installation guides mistakenly claim.
A nearby lightning strike doesn't need a direct hit to fry your router — induced voltage across an ungrounded cable run is enough on its own. Skipping this step is also a common reason insurers deny storm-damage claims on fried networking equipment. Parts for a proper ground run cost $30 to $80; if you're not confident bonding to your main service ground yourself, this is the one step worth paying an electrician for even if you DIY everything else. With the dish mounted, cabled, and grounded, the remaining steps happen almost entirely inside the house.
Connecting Wi-Fi and Activating Your Service
Once the cable reaches your router — the Gen 3 router on a Standard kit, or the compact Router Mini on V5 — plug in the power supply and wait about five minutes for the system to boot and download its first firmware update. Connect to the unsecured STARLINK network from your phone, open the Starlink app, and follow the prompts to set a custom network name and password.
The app shows five status states as the dish acquires satellites. Online means everything is working; Online with an alert means it's working but flagging something minor; Offline usually resolves itself as the dish keeps searching; Restricted means the kit still needs activation; and Disconnected almost always points to a cabling or power issue rather than anything with the satellites themselves.
Most Gen 3 and V5 routers now support Wi-Fi 6 (802.11ax) with WPA3 encryption, cover roughly 3,200 square feet in open layouts, and handle over 200 connected devices without a mesh extender. That's enough range for most single-family homes before you need to add mesh nodes for a larger or oddly shaped floor plan.
Before you consider the job finished, check your real latency rather than trusting the app's summary number alone — round-trip time is the one metric that behaves noticeably differently on satellite internet than on cable or fiber, and a proper ping test shows exactly what you're getting in milliseconds. Getting online is the easy part. What almost no installation guide explains is what kind of IP address you actually end up with — and why that quietly breaks anything that needs an inbound connection.
Your Starlink IP Address: CGNAT, Port Forwarding, and Getting a Public IP
Most Starlink Residential and Roam customers sit behind Carrier-Grade NAT (CGNAT), meaning your router receives a private address while thousands of customers share a small pool of public IPv4 addresses at Starlink's network edge. That single fact is why port forwarding doesn't work out of the box: there's no dedicated public IPv4 address pointed at your home for inbound traffic to reach. A public IPv4 add-on exists, but only on Priority-tier plans, not standard Residential.
This matters the moment you try to host anything from home — a security camera feed, a game server, a self-hosted app, or remote desktop access. Starlink's own router adds a second limitation on top of CGNAT: it doesn't expose port forwarding or custom firewall rules for IPv4 or IPv6, even for customers who do have a public address. For that level of control, you need a third-party router running in bypass mode behind the Starlink hardware. For the underlying mechanics of how this is normally supposed to work on a conventional connection, our guide to how port forwarding actually works is the right place to start before comparing it against Starlink's CGNAT model.
IPv6 is the partial exception. Starlink does assign public IPv6 addresses, which technically sidesteps CGNAT — but the stock router's firewall blocks unsolicited inbound connections by default, with no toggle to turn that off short of bypass mode. In practice, most residential customers end up choosing between three paths: a VPN provider that offers port forwarding through its own tunnel, a small VPS running a reverse tunnel back to the home network, or simply upgrading to a Priority plan for a real public IPv4 address. Anyone considering running a VPN on top of a CGNAT connection should expect a small latency and throughput cost from the extra hop.
There's a second, quieter effect of how Starlink routes traffic: your connection often exits through a Point-of-Presence hundreds of miles from your actual address, which is why an IP lookup tool sometimes shows a city you've never lived in. That's normal for satellite routing, not a sign anything's broken. It's also related to a common complaint we cover in a dedicated breakdown of why Starlink IPs shift over time.
If you want to see exactly what address Starlink has assigned you right now, TrustMyIP's IP lookup tool shows both the address and where it appears to originate from in one check. None of this is a reason to avoid Starlink — it's a reason to know what you're working with before you're troubleshooting a broken camera feed at 11 PM.
HOA Rules and Your Legal Right to Install (FCC OTARD)
Federal law protects your right to install a Starlink dish even if your HOA's covenant technically bans satellite equipment. The FCC's Over-the-Air Reception Devices rule, adopted under Section 207 of the Telecommunications Act of 1996, covers any antenna under one meter in diameter installed in an area you have exclusive use of — your own roof, yard, patio, or balcony — and every current Starlink dish qualifies by size.
The protection has real limits, and HOAs aren't powerless. They can still require reasonable advance notice, restrict installation on shared common areas like a condo building's shared roof, and enforce genuine safety or historic-preservation rules. What they cannot do is ban the dish outright, charge you extra for installing it, or force you into a spot where you can't receive an acceptable signal.
If a dispute does come up, the practical first step is resolving it directly with the HOA in writing before escalating. If that fails, the FCC accepts a formal Petition for Declaratory Ruling, and property owners are generally free to keep using the antenna while that petition is pending, except in genuine safety or historic-district cases.
California adds its own layer through Civil Code Section 4725, and several other states carry similar statutes — worth a quick check if your HOA is particularly aggressive about enforcement. Legal right to install is one thing; deciding whether to actually do it yourself is a separate, more practical question, and the honest answer depends on your roof, not your confidence level.
DIY vs. Professional Installation: Real 2026 Costs
A basic single-story DIY installation costs nothing beyond the $349 to $599 hardware kit, since everything needed ships in the box. Professional installation adds $100 to $600 depending on mount complexity, cable routing, and roof access — Starlink's own certified-installer network charges a flat $250 for a standard job, while independent electricians and low-voltage techs charge more for two-story or attic-heavy work.
| Path | Typical Cost | Timeline | Best For |
|---|---|---|---|
| DIY, single-story | $0–150 | 2–4 hours | Simple roofline, comfortable on a ladder |
| DIY + mount upgrade | $80–250 | 3–6 hours | Pole mount, grounding, sealant work |
| Starlink-certified installer | $250 flat | 2–3 hours | Standard single-story install |
| Independent tech | $200–600 | 3–8 hours | Two-story, attic runs, complex roofs |
| Custom pole install | $600–1,500 | 1–2 days | Above tree canopy, concrete footing |
Roughly two-thirds of Starlink buyers self-install successfully, and the electronics genuinely are plug-and-play — it's the physical work that trips people up. Hiring out makes clear sense in a specific set of situations: a roof mount above two stories, where a fall carries real consequences; an attic cable run through blown-in insulation or a finished ceiling; a tile, slate, or cedar-shake roof that needs specialized flashing; or grounding work you're not fully confident bonding to code yourself.
For everyone else — a single-story home, a straightforward eave or pole mount, and a cable run that doesn't need to cross a finished ceiling — DIY genuinely saves the $200 to $600 without meaningfully increasing the risk of a bad install. Whichever path you choose, a short list of mistakes accounts for almost every Starlink support ticket related to installation, and it's worth five minutes to read before you start.
Installation Mistakes That Cost People Money
The costliest Starlink installation mistakes are rarely about the electronics — they're almost always physical: mounting somewhere that looks clear but isn't, using silicone instead of polyurethane sealant on roof penetrations, skipping grounding entirely, and undersizing a pole's footing for local wind load. Every one of these mistakes is fully preventable with a five-minute check before you commit to a permanent mounting spot, and fixing any of them later costs far more than getting it right the first time.
- → Mounting too low or behind a hidden obstruction — chimneys, vent stacks, and the far side of a hip roof commonly sneak into the sky-view cone even after a mount looks clear from the ground.
- → Silicone sealant on asphalt shingles — fails under UV within two to three years; use polyurethane sealant with a properly flashed boot instead.
- → Skipping the drip loop — without a downward loop, water follows the cable jacket by capillary action straight into the wall.
- → Kinking the cable — any bend under a 4-inch radius can damage the internal conductors on the proprietary SXPOE line.
- → Skipping grounding entirely — a leading reason insurers deny storm-damage claims on fried routers and downstream devices.
- → Undersized pole footing — wind load scales with height squared, not linearly, so a taller pole needs disproportionately more anchoring.
- → Not re-registering your service address after a long-distance move — this causes silent speed degradation as the dish tries to reach the wrong satellite cell.
Every mistake on this list shows up in Starlink support tickets on a regular basis, and every one is avoidable with the checks covered earlier in this guide. None of them require special tools or expertise — just doing the site survey, the sealant, and the grounding in the right order instead of skipping ahead to get online faster.
Conclusion: The Dish Is the Easy Part
Installing Starlink at home is genuinely a self-install job for most people — the electronics are plug-and-play, and SpaceX keeps improving that experience with every hardware generation, most recently with the smaller, more efficient V5 dish. What separates a five-minute frustration from a five-year installation is almost never the satellite technology itself. It's the site survey, the mount choice, the grounding, and — the part most guides skip entirely — knowing what kind of IP address you'll actually have once you're online.
If your roof is a single story with a clear southern exposure, do it yourself and save the $200 to $600 a professional would charge. If you're facing a two-story mount, a complicated attic run, or grounding you're not confident bonding to code, that's genuinely the moment to hire it out — not a failure of DIY nerve.
For the deeper technical picture of how your dish talks to the satellite constellation and what that means for your public IP address, TrustMyIP's full breakdown of Starlink's IP addressing model is the natural next read. Whatever you install, start by confirming your connection is live and performing the way it should.
Test Your New Starlink Connection
Confirm your real download, upload, and latency numbers, or check exactly what public IP address and location your Starlink connection is broadcasting.