You type 127.0.0.1 into your browser and something loads. Or you run a local server and your terminal says Running on http://localhost:8080. It works — but do you actually know why? The loopback address is one of the most important concepts in networking, yet most developers use it daily without understanding what's happening under the hood. And when things break — Docker containers refusing connections, localhost resolving to the wrong IP, services not responding — that missing knowledge costs hours of debugging.
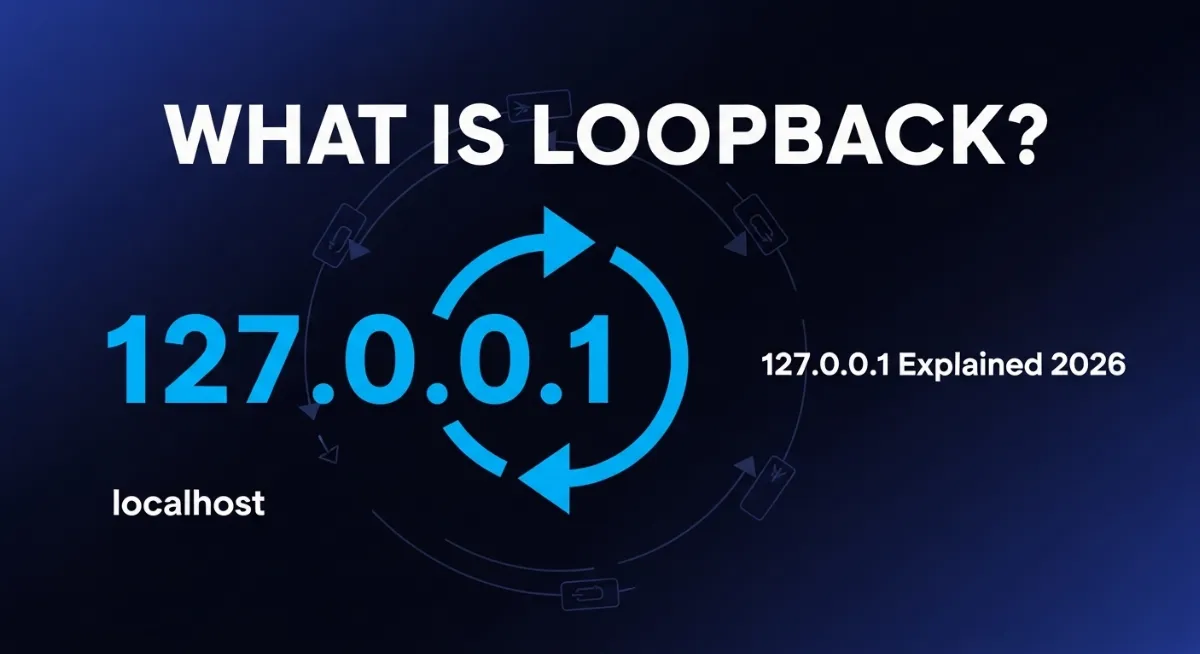
A loopback address is a reserved IP address your device uses to communicate with itself. In IPv4, it's 127.0.0.1 (and the entire 127.0.0.0/8 block). In IPv6, it's ::1. When traffic is sent to a loopback address, it never touches your network card, never leaves your machine — it loops right back to the originating process inside your operating system's network stack. This makes it the foundation of local development, service testing, and TCP/IP diagnostics across every platform from Windows to Linux to macOS.
This updated 2026 guide goes deeper than the basics. You'll understand the exact difference between 127.0.0.1, localhost, and 0.0.0.0 — a distinction that trips up developers constantly, especially in containerized environments like Docker. You'll learn how the loopback interface actually works at the OS level, real-world use cases, how to test it on every platform, what breaks it, and how to fix it. No fluff — just everything you need to truly understand loopback addressing in 2026.

"I've done thousands of network diagnostic sessions over my career, and I can tell you: 127.0.0.1 causes more developer confusion than almost any other address in networking. The classic one: a developer binds their Flask app to 127.0.0.1 inside a Docker container, then wonders why the browser can't reach it. The answer is that 127.0.0.1 inside the container namespace is completely separate from 127.0.0.1 on your host machine. They are different loopback interfaces, isolated by design.
The loopback address isn't just a convenience for running local web servers — it's the diagnostic backbone of TCP/IP networking. When ping 127.0.0.1 fails, the problem isn't your router, your ISP, or your internet connection. It's your TCP/IP stack itself. And understanding why the loopback interface exists, how it differs from your LAN IP and from 0.0.0.0, and exactly how data flows through it will make you a significantly better developer and network troubleshooter in 2026."
Quick Answer: What is a Loopback Address?
A loopback address is a special reserved IP your device uses to send traffic to itself without using any physical network hardware. 127.0.0.1 is the standard IPv4 loopback address (the full 127.0.0.0/8 block is reserved). ::1 is the IPv6 loopback. Localhost is a hostname that resolves to 127.0.0.1 via your hosts file — similar but technically different. 0.0.0.0 is not a loopback address — it means "listen on all interfaces." Use 127.0.0.1 for local-only services; use 0.0.0.0 when you need external devices or Docker containers to reach your server. Check your live public IP with our TrustMyIP IP checker.
1. What is a Loopback Address? The Clear Explanation
A loopback address is a reserved IP address that always routes traffic back to your own device — the same machine sending the data. It is completely self-referential. Unlike any other IP address on a network, the loopback address never involves a network card, a router, a cable, or an internet connection. The entire trip happens inside your operating system's network stack, in memory.
Think of it like sending a message to yourself through a pneumatic tube inside your own house, rather than through the postal system. The tube goes nowhere outside — it delivers instantly, back to you. This is why loopback addresses are so valuable for development and diagnostics: they simulate a full network connection with zero dependency on external infrastructure.
The most widely used loopback address is 127.0.0.1 in IPv4. But the entire 127.0.0.0/8 subnet — covering 127.0.0.0 through 127.255.255.255 — is permanently reserved for loopback purposes. IPv6 reserves a single address: ::1. All of these addresses share the same behaviour: traffic sent to them never leaves your device. To understand where loopback fits in the broader IP ecosystem, see our guide on what an IP address is.
| Address Type | IPv4 Example | IPv6 Example | Where Traffic Goes |
|---|---|---|---|
| Loopback | 127.0.0.1 | ::1 | Back to same device — never leaves |
| Listen All Interfaces | 0.0.0.0 | :: | Any interface — loopback + LAN + internet |
| Private LAN IP | 192.168.1.10 | fd00::1234 | Other devices on your local network |
| Public IP | 203.0.113.5 | 2001:db8::1 | Any device on the internet |
2. How the Loopback Interface Actually Works (Step by Step)
The loopback interface (named lo on Linux/Mac, Loopback Pseudo-Interface 1 on Windows) is a virtual network interface built directly into your operating system. It has no corresponding physical hardware — no network card, no cable. It exists purely in software, managed entirely by your TCP/IP stack.
When an application sends data to 127.0.0.1, here is exactly what happens internally — a sequence most networking guides skip entirely:
Application creates a socket and makes a connection request to 127.0.0.1 on a specified port — exactly as it would for any network connection.
OS recognises the destination immediately as a loopback address. The routing table entry for 127.0.0.0/8 points to the loopback interface — no physical NIC involved.
Full protocol stack runs — TCP/IP headers are added, ports are assigned, checksums are calculated. The system processes it like real network traffic, but entirely in memory.
Data is placed in a kernel buffer — the loopback interface copies the packet from the send buffer to the receive buffer without touching any hardware.
Receiving process gets the data — the server application listening on 127.0.0.1 receives the packet. A response follows the same path in reverse.
Result: sub-millisecond latency — because no hardware is involved, loopback communication is bound only by CPU speed and memory bandwidth, not network latency.
This is why loopback ping times show <1ms — the data literally never travels further than your computer's RAM. For deeper networking context, see our guide on public vs private IP addresses.
3. 127.0.0.1 vs Localhost vs 0.0.0.0: The Differences That Actually Matter
This is the question that causes the most real-world confusion, especially for developers working with Docker, containers, or cross-platform code. These three addresses look similar in config files but behave very differently. Getting them wrong means your server works in one environment and silently breaks in another.
127.0.0.1 — The Actual Loopback IP
127.0.0.1 is the IP address itself — hardcoded into every operating system. It always means "this device" and requires no name resolution. If you bind a server to 127.0.0.1, it is only reachable from the same machine. No other device on your LAN can connect to it. No Docker container running on a separate network namespace can reach it. It is the most secure default for local-only services.
localhost — The Hostname (Not Always 127.0.0.1)
Localhost is a hostname that your OS resolves using the hosts file (C:\Windows\System32\drivers\etc\hosts on Windows, /etc/hosts on Mac/Linux). By default it maps to 127.0.0.1 — but this can be changed. More importantly, as of 2024, Windows by default resolves localhost to ::1 (IPv6), not 127.0.0.1. This catches developers off guard when their server listens on IPv4 127.0.0.1 but their test code queries localhost — which resolves to IPv6 ::1 — and the connection fails silently. When precision matters, use the actual IP, not the hostname.
0.0.0.0 — Listen on ALL Interfaces (Not Loopback)
0.0.0.0 is not a loopback address at all. When used as a server bind address, it means "accept connections on every available network interface" — your loopback (127.0.0.1), your LAN IP (192.168.x.x), your WiFi card, everything. This is the address you need when you want external devices or Docker containers to reach your server. The trade-off: 0.0.0.0 exposes your service to your entire network, so proper firewall rules become essential.
| Address | Type | Who Can Connect | Use When |
|---|---|---|---|
| 127.0.0.1 | IPv4 loopback IP | Same machine only | Local dev, admin panels, DBs |
| localhost | Hostname (resolves via hosts file) | Usually same machine (may be IPv6 on Windows) | Convenience — but verify which IP it resolves to |
| 0.0.0.0 | All-interfaces bind address | Any device on any interface | Docker containers, LAN sharing, production servers |
| ::1 | IPv6 loopback | Same machine (IPv6 stack) | IPv6-enabled apps, dual-stack testing |
4. The Docker Problem: Why 127.0.0.1 Breaks in Containers
This is the loopback issue that causes the most hours of lost development time in 2025-2026. If you've ever run a server inside a Docker container and gotten "connection refused" when trying to reach it from your browser, this section explains exactly why.
The core reason: Docker containers run in their own isolated network namespace. Each container has its own loopback interface — its own private 127.0.0.1 — completely separate from the host machine's 127.0.0.1. When your Flask or Node.js server binds to 127.0.0.1 inside the container, it is listening on the container's loopback interface. When your browser connects to 127.0.0.1 on the host, it hits the host's loopback interface. These are two different interfaces in two different network namespaces — they cannot reach each other.
The Fix: Bind to 0.0.0.0 Inside Docker Containers
Inside a container, any server that needs to be reachable from outside must bind to 0.0.0.0, not 127.0.0.1. Examples:
Flask: flask run --host=0.0.0.0 or in code: app.run(host='0.0.0.0')
Node.js: server.listen(3000, '0.0.0.0')
Python http.server: python3 -m http.server --bind 0.0.0.0 8000
Then in docker-compose: map with ports: - "8000:8000" and connect from host to 127.0.0.1:8000 or localhost:8000.
The pattern is: inside the container, bind to 0.0.0.0 so Docker's port forwarding can reach the service. On the host, use 127.0.0.1 or localhost when connecting through the mapped port. Confusing these two steps is the source of nearly every "connection refused" error developers hit when containerising applications. Use our port scanner tool to verify which ports are actually open and listening.
5. Why 127.0.0.1 Exists: The Purpose of Loopback
Loopback addressing was designed into TCP/IP from its earliest days, solving a fundamental problem: how do you test and develop network software without needing a network? Before loopback existed, testing a server required at minimum two machines — one to run the server, one to connect to it. The loopback address collapsed that into a single machine.
The practical value is enormous. You can run a full web application stack — database, API backend, frontend server — on a single laptop, on an airplane with no WiFi, with zero external infrastructure. Every service communicates over the loopback interface using the same networking protocols — TCP, UDP, HTTP, WebSockets — as production systems. The code and configuration are identical. Only the address changes at deployment time.
| Use Case | How Loopback Helps | Example |
|---|---|---|
| Web Development | Test entire sites locally without deploying | http://localhost:3000 |
| Database Connections | Local MySQL, PostgreSQL, MongoDB — hidden from network | mysql://127.0.0.1:3306 |
| REST API Testing | Run and debug APIs offline | http://127.0.0.1:8000/api/v1 |
| TCP/IP Stack Testing | Verify OS network stack is functional | ping 127.0.0.1 |
| Security Isolation | Admin panels only accessible locally | Admin UI on 127.0.0.1:9090 only |
| Website Blocking (Hosts File) | Redirect domains to 127.0.0.1 to block them | 127.0.0.1 ads.example.com |
| Multiple Local Services | Use 127.0.0.2, 127.0.0.3 for separate services on same port | 127.0.0.2:80 and 127.0.0.3:80 simultaneously |
6. The Full 127.0.0.0/8 Block: More Than Just One Address
Most people only know 127.0.0.1, but the entire 127.0.0.0/8 subnet — all 16,777,216 addresses from 127.0.0.0 to 127.255.255.255 — is permanently reserved for loopback by IANA (Internet Assigned Numbers Authority). Every address in this range behaves like a loopback address on virtually all modern operating systems.
This means ping 127.0.0.2, ping 127.50.50.50, and ping 127.255.0.1 all work on most systems — they all loop back to your own device. In practice, the alternate loopback addresses (anything other than 127.0.0.1) are useful in one specific scenario: running multiple local services that need to share the same port number. For example, two different development servers both needing port 80 can be bound to 127.0.0.1:80 and 127.0.0.2:80 respectively — same port, different loopback IPs.
Two addresses in the range behave differently: 127.0.0.0 is the network address and is not usable as a host address. 127.255.255.255 is the broadcast address for the loopback subnet. Stick to addresses between 127.0.0.1 and 127.255.255.254 for actual use. Explore IP address range concepts with our subnet calculator.
127.0.0.0/8 Block — Key Facts
Full Range: 127.0.0.0 — 127.255.255.255
CIDR: 127.0.0.0/8 (first 8 bits fixed = "127")
Total Addresses: 16,777,216 (2²⁴)
Subnet Mask: 255.0.0.0
Network Address: 127.0.0.0 (not usable as host)
Broadcast Address: 127.255.255.255 (not usable as host)
Default Used: 127.0.0.1 in virtually all cases
Practical Alternate Use: 127.0.0.2 through 127.0.0.10 for multi-service same-port testing
Authority: Reserved by IANA per RFC 5735 / RFC 1122
7. IPv6 Loopback: Understanding ::1
IPv6 takes a much cleaner approach to loopback: instead of reserving 16 million addresses, it designates exactly one — ::1. Written in full, this is 0000:0000:0000:0000:0000:0000:0000:0001, shortened to ::1 using IPv6 compression rules (consecutive groups of zeros collapse to ::).
The behaviour is identical to IPv4's 127.0.0.1 — traffic sent to ::1 never leaves the device. But there is an important compatibility point: if your application only listens on IPv4 (127.0.0.1) and a client connects to localhost on a system where localhost resolves to ::1 (like modern Windows), the connection will fail. Applications built for 2026 should support dual-stack operation — listening on both 127.0.0.1 and ::1 simultaneously.
When using ::1 in URLs, the address must be wrapped in square brackets: http://[::1]:8080. Without the brackets, parsers interpret the colons as port separators and fail. This applies to curl, browser address bars, and any URL-parsing library. Learn more about IPv6 addressing in our complete IPv6 guide.
| Feature | IPv4 Loopback | IPv6 Loopback |
|---|---|---|
| Address | 127.0.0.1 | ::1 |
| Reserved Range | 127.0.0.0/8 (16.7M addresses) | ::1/128 (single address) |
| Ping Command (Windows) | ping 127.0.0.1 | ping ::1 |
| Ping Command (Mac/Linux) | ping 127.0.0.1 | ping6 ::1 |
| URL Format | http://127.0.0.1:8080 | http://[::1]:8080 |
| localhost Resolution | 127.0.0.1 (Linux, older Windows) | ::1 (Windows 2024+ default) |
| RFC Reference | RFC 5735, RFC 1122 | RFC 4291, RFC 4038 |
8. How to Test Your Loopback Address on Every Platform
Testing your loopback address confirms your TCP/IP stack is working correctly. If ping 127.0.0.1 fails, the problem is not your internet connection or router — it is your OS network stack. Here is how to test on every major platform in 2026.
Complete Loopback Testing Guide — All Platforms
1 Basic Ping Test (All Platforms)
Windows (Command Prompt): ping 127.0.0.1 — sends 4 packets by default.
Mac/Linux: ping -c 4 127.0.0.1 — the -c 4 limits to 4 packets.
Expected result: Reply from 127.0.0.1: time<1ms — latency under 1ms, 0% packet loss.
Force IPv4 on Windows: ping -4 localhost (prevents Windows defaulting to ::1).
Alternatively, use our online ping tool to test connectivity to any address from outside your network.
2 Test IPv6 Loopback (::1)
Windows: ping ::1
Mac/Linux: ping6 ::1 or ping -6 ::1
Browser test: Navigate to http://[::1] — brackets required for IPv6 in URLs.
Dual-stack tip: test both IPv4 and IPv6 loopback if your apps support both protocols.
3 Test a Running Local Server (Browser or curl)
Browser: Go to http://127.0.0.1:PORT (replace PORT with 3000, 8080, 5000, etc.)
curl (terminal): curl http://127.0.0.1:8000 — returns the server's response in terminal.
"Connection refused" means no server is listening on that port — the loopback interface is fine, the server is not running.
"Connection timed out" means a firewall is blocking the port, not that the server is down.
4 Check What's Listening on a Port
Windows: netstat -ano | findstr :8080 — lists processes using port 8080.
Mac/Linux: lsof -i :8080 or ss -tlnp | grep 8080
For a visual approach, use our port scanner tool to see which ports are open on any address.
5 Verify Your Hosts File (localhost Resolution)
Windows: Open C:\Windows\System32\drivers\etc\hosts as Administrator.
Mac/Linux: cat /etc/hosts or sudo nano /etc/hosts
Look for: 127.0.0.1 localhost and ::1 localhost — both should be present for dual-stack support.
Check where localhost actually resolves: ping -n 1 localhost (Windows) — the response shows the actual IP used.
9. Common Loopback Problems and Exact Fixes
Loopback issues fall into a small set of recurring patterns. Here are the most common problems developers and sysadmins encounter in 2026, with precise solutions for each.
❌ Problem: ping 127.0.0.1 fails or times out
Cause: Corrupted TCP/IP stack, or a software firewall blocking loopback traffic.
Fix:
- Windows (run as Admin):
netsh int ip resetthennetsh winsock reset→ restart - Check Windows Firewall: Ensure "Core Networking — Loopback" rules are enabled
- Linux:
sudo ifconfig lo uporsudo ip link set lo upto bring loopback interface up - If antivirus is blocking: Temporarily disable and retest — some AV software incorrectly blocks loopback
⚠️ Problem: localhost resolves to ::1 but server is on 127.0.0.1
Cause: Windows 2024+ defaults localhost to IPv6 (::1). Server is IPv4-only.
Fix:
- Use
127.0.0.1directly instead oflocalhostin your connection string - Or make your server listen on both: bind to
0.0.0.0to accept IPv4 and IPv6 connections - Or edit hosts file to ensure
127.0.0.1 localhostis the first entry (before::1 localhost)
❌ Problem: Docker container — "connection refused" on localhost
Cause: Server inside container bound to 127.0.0.1 (container-local loopback) — unreachable from host.
Fix:
- Change server bind address inside container to
0.0.0.0(see Section 4 above) - Ensure docker-compose ports mapping is correct:
- "HOST_PORT:CONTAINER_PORT" - Test with:
docker exec -it CONTAINER_NAME curl http://127.0.0.1:PORTto verify server is running inside
⚠️ Problem: "Address already in use" on 127.0.0.1:PORT
Cause: Another process is already listening on that port.
Fix:
- Windows:
netstat -ano | findstr :PORT→ note PID →taskkill /PID number /F - Mac/Linux:
lsof -ti:PORT | xargs kill -9 - Or simply choose a different port for your new service
🔵 Problem: Malware modified the hosts file — localhost redirecting wrongly
Cause: Some malware modifies /etc/hosts or Windows hosts file to redirect domains including localhost.
Fix:
- Open and inspect the hosts file directly (paths listed in Section 8 above)
- Remove any suspicious entries — legitimate entries should only be
127.0.0.1 localhostand::1 localhost - Run a malware scan after cleaning to address the root cause
- Use
127.0.0.1directly instead oflocalhostas an immediate workaround
10. Practical Loopback: What to Use When
Knowing the theory is one thing — knowing which address to use in which real-world scenario is what makes the difference. Here is a clear decision guide for the most common situations developers and sysadmins face in 2026.
✅ Use 127.0.0.1 When:
- ✓Running a local dev server you only need from the same machine
- ✓Connecting to a local database (MySQL, PostgreSQL, Redis) from your app on the same machine
- ✓Running admin tools or dashboards that should never be exposed to the network
- ✓Troubleshooting TCP/IP stack health (ping 127.0.0.1)
- ✓Blocking websites in the hosts file (redirecting to 127.0.0.1)
✅ Use 0.0.0.0 When:
- ✓Running a server inside a Docker container that needs to be reached from outside the container
- ✓Testing your local site from a phone or another device on the same WiFi
- ✓Deploying a server that needs to accept connections on all available network interfaces
- ✓Running an API that teammates on the same LAN need to reach
For finding IP addresses of other devices on your local network — cameras, smart home devices, IoT hardware — these will have real private IPs (192.168.x.x range), not loopback addresses. See our guide on how to find the IP address of a WiFi camera for practical network device discovery. Check your actual public IP with our IP geolocation lookup.
Conclusion: Loopback Is Foundational — Now You Truly Understand It
The loopback address — 127.0.0.1 in IPv4, ::1 in IPv6 — is one of the most fundamental concepts in networking. Every developer uses it. But most use it without understanding the distinctions that matter when things go wrong: why localhost might not be 127.0.0.1 on modern Windows, why binding to 127.0.0.1 inside Docker breaks external connectivity, and why 0.0.0.0 is not a loopback address at all but means something entirely different.
The key takeaways from this 2026 guide: loopback traffic never leaves your device and bypasses all physical hardware. The entire 127.0.0.0/8 block is reserved for loopback, giving you 16 million addresses — though 127.0.0.1 is used in virtually every real scenario. Localhost is a hostname that resolves via the hosts file and should not be assumed to always equal 127.0.0.1 — on Windows especially. 0.0.0.0 means all interfaces, not loopback — use it when you need external access. Docker isolates loopback namespaces per container, requiring server bind addresses of 0.0.0.0 for external reach. And ping 127.0.0.1 remains the fastest first diagnostic when any network application misbehaves.
Keep building your networking knowledge: understand what IP addresses are, master subnet masks, and explore how DNS resolution works — including how localhost gets translated to an IP address through the hosts file and DNS resolver chain.
Test Your Network Right Now
Verify your loopback connectivity, scan open ports, and see your real public IP address — all with our free network diagnostic tools.